Mobile Application
The majority of RingRx users will make use of our robust mobile application. Regardless of the platform the capabilities are the same.
Installation
Android
You can install the Android app from Google Play
iPhone
You can install the iOS app from iTunes
Logging In
Logging in normally
Once installed, you simply login with the email address for your RingRx user and that accounts password
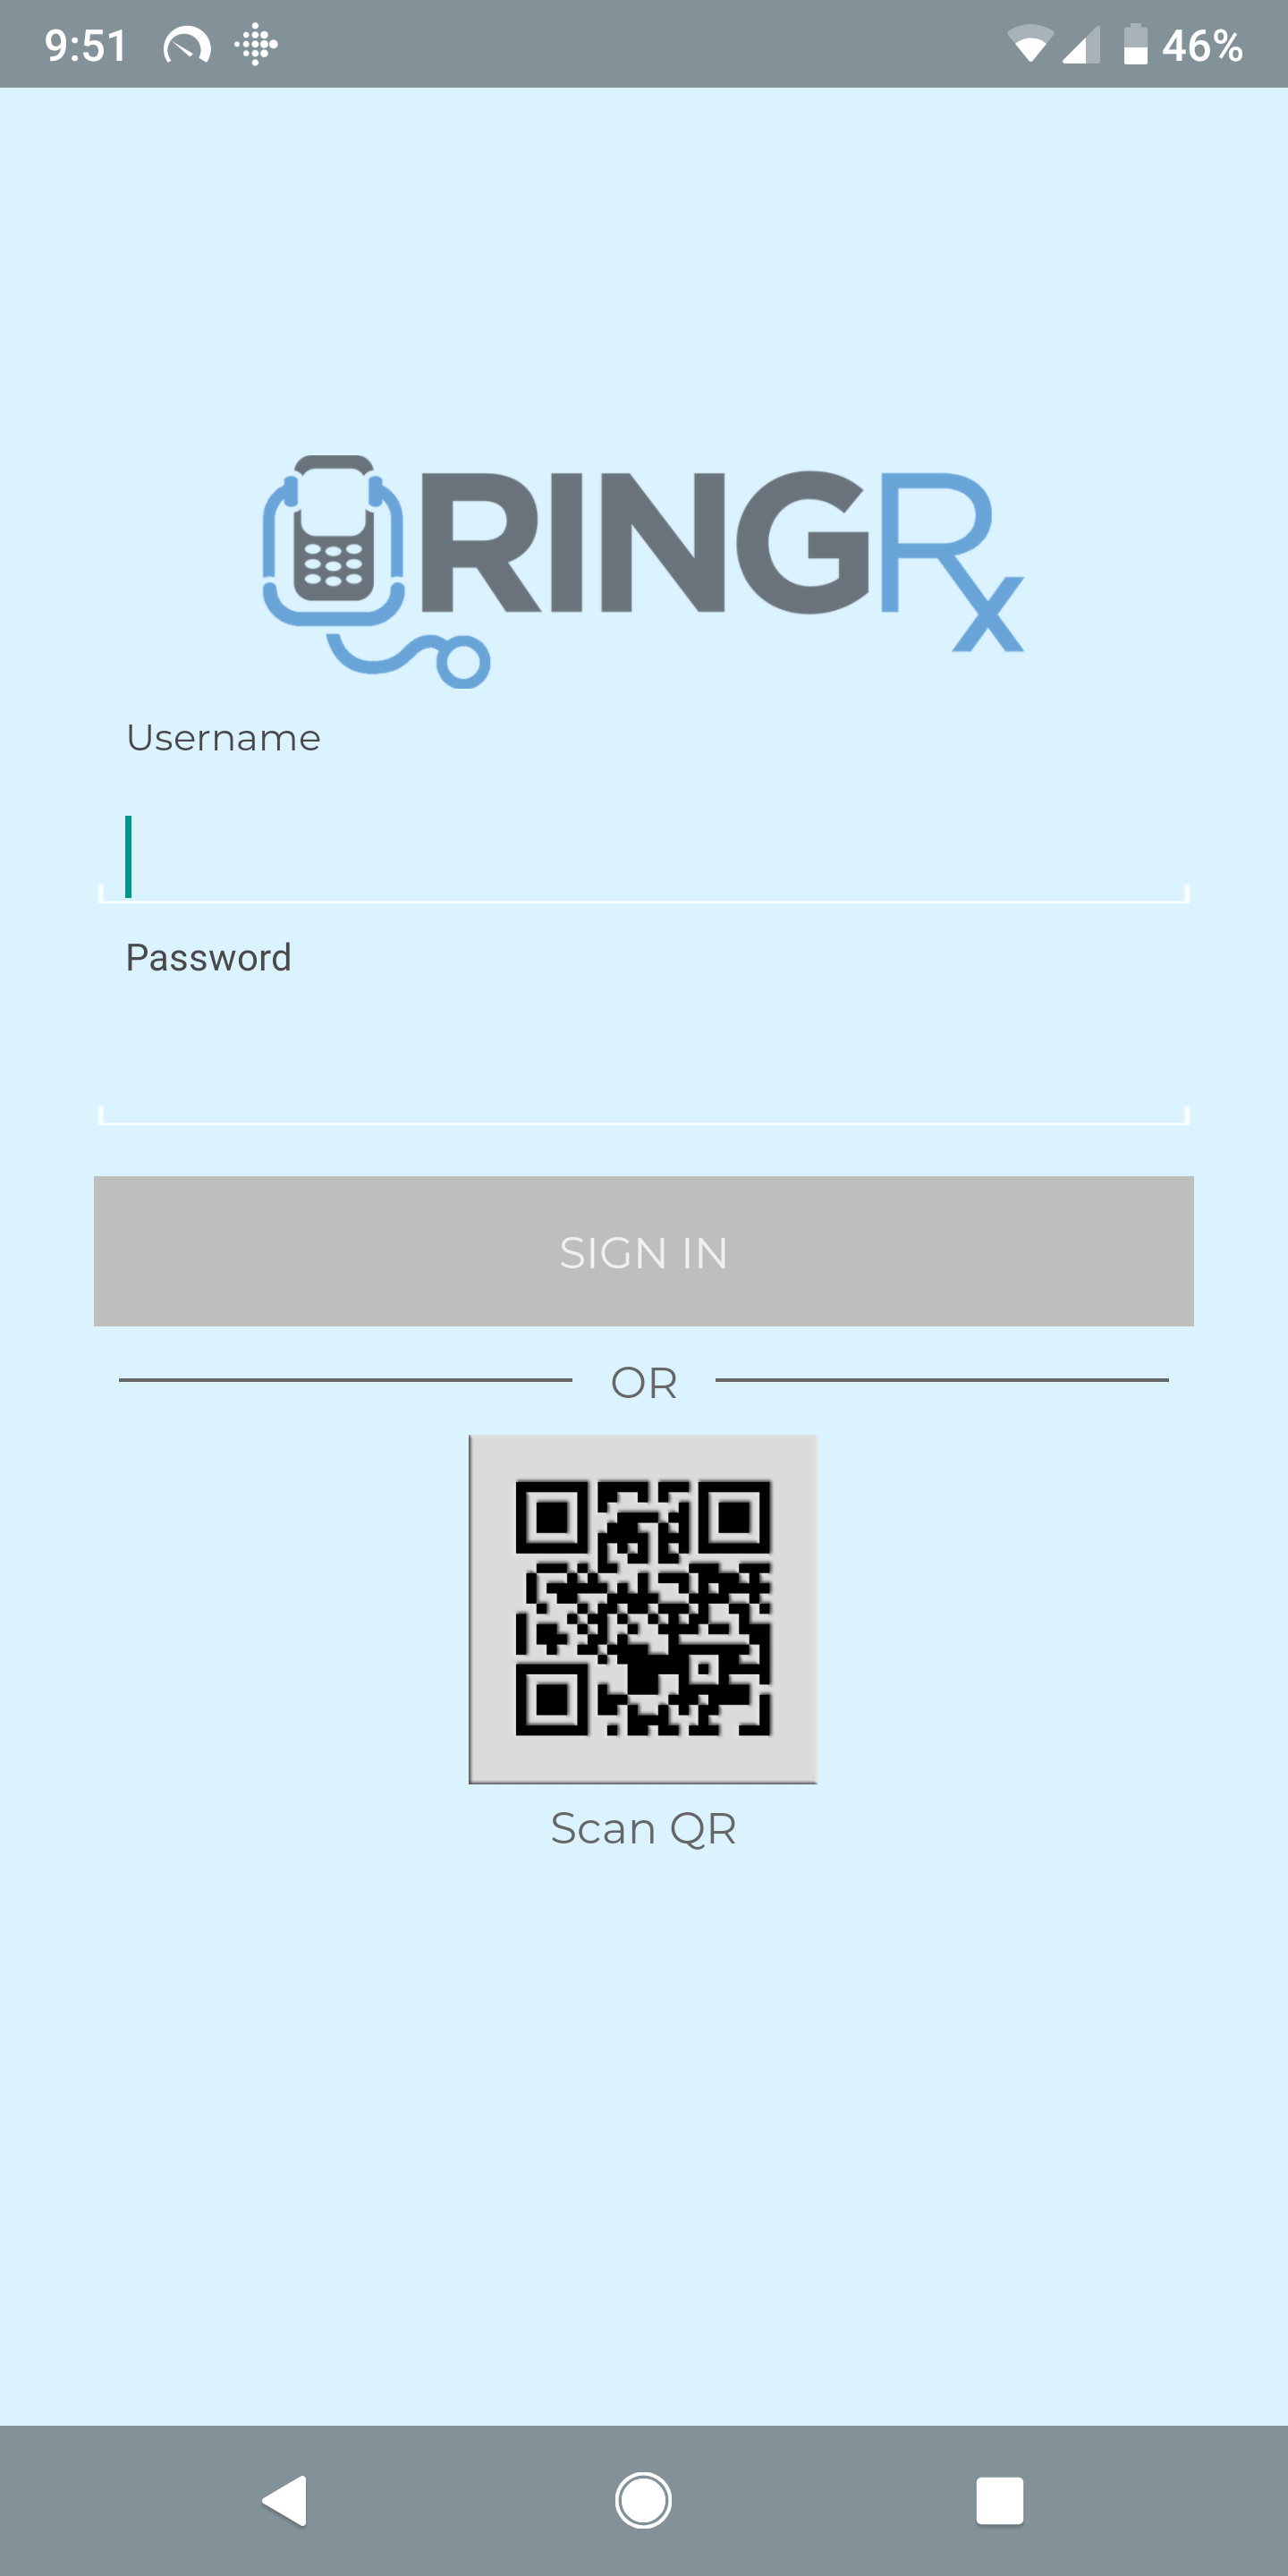
Using a QR Code
Alternatively you may login using a QR code generated from the portal using details QR Code
Navigate to My Phone
Scroll down to the QR code and click generate

Press the QR code on the app login screen and aim it at the generated QR code.
Contacts
The mobile app allows you access to two different contact silos.
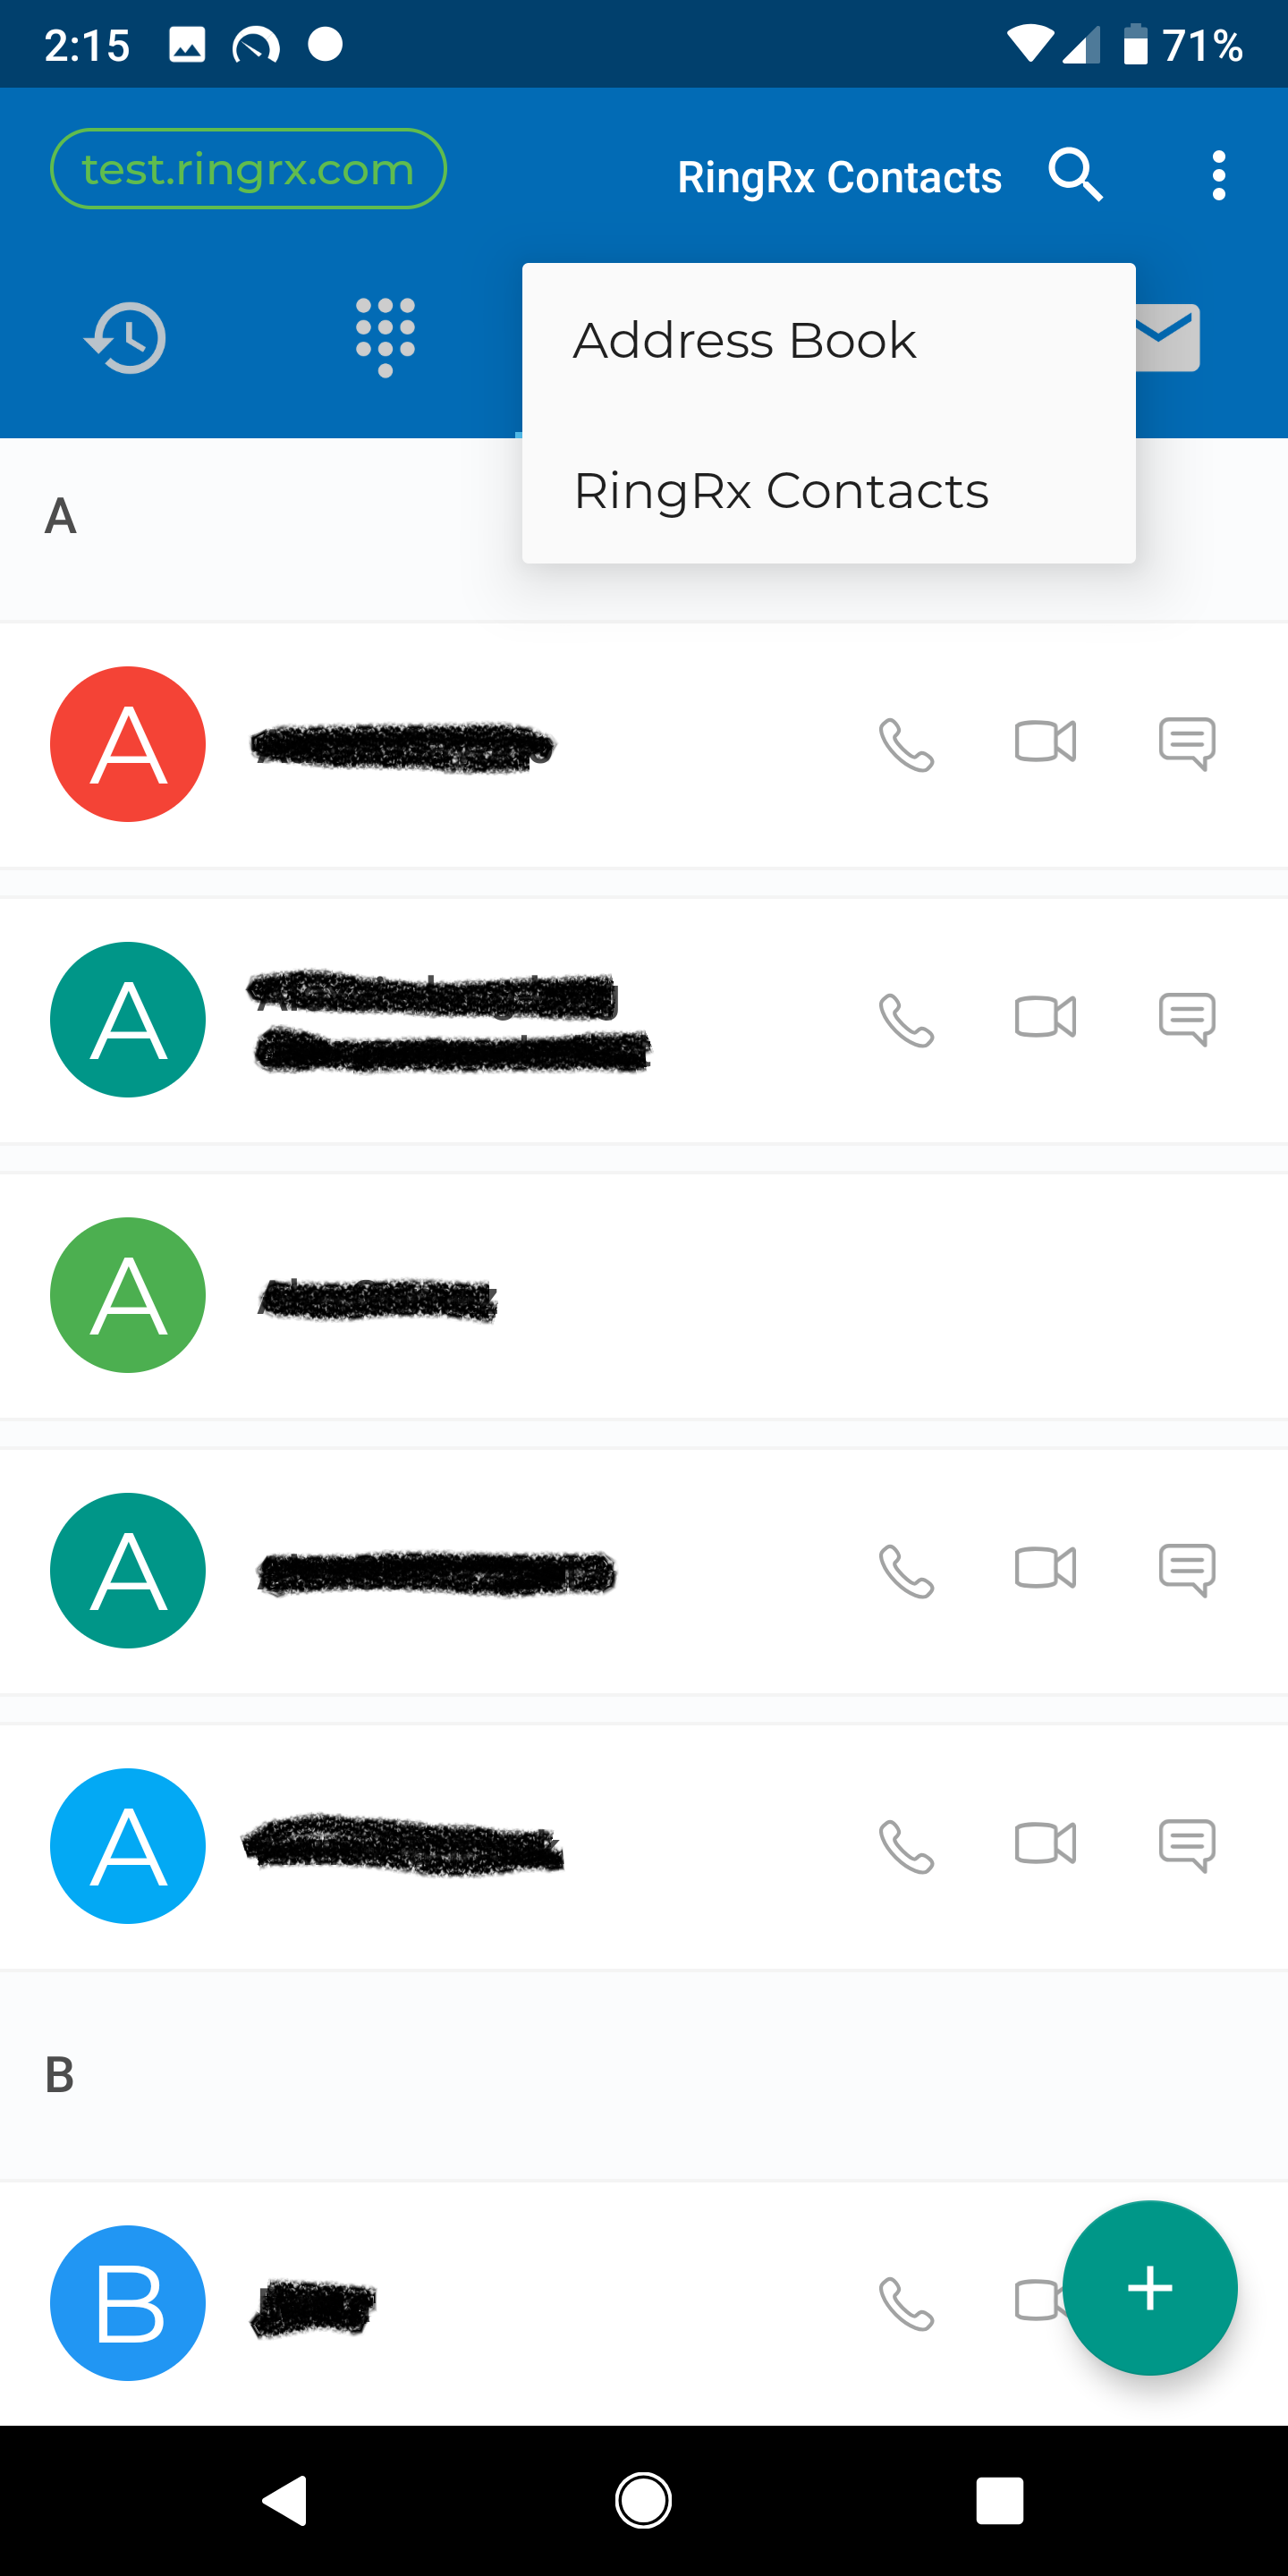
These are managed differently
Phone Contacts
These will be your own phone contacts. These are managed through your native phone and are stored on your phone.
RingRx Contacts
These are kept separate from your phone contacts and are NOT backed up with your phone data so these remain secure for PHI reasons.
This will include:
- Your Contacts:
These are your private RingRx contacts
- Group Contacts:
These are contacts anyone in your account has denoted as a group contact
- Directory:
All other users/extensions in your RingRx account. This allows you to easily find and dial co-workers even in large organizations.
Collecting Logs
Occasionally support may need logs from the mobile device to help diagnose an issue.
Enabling Logs on Android
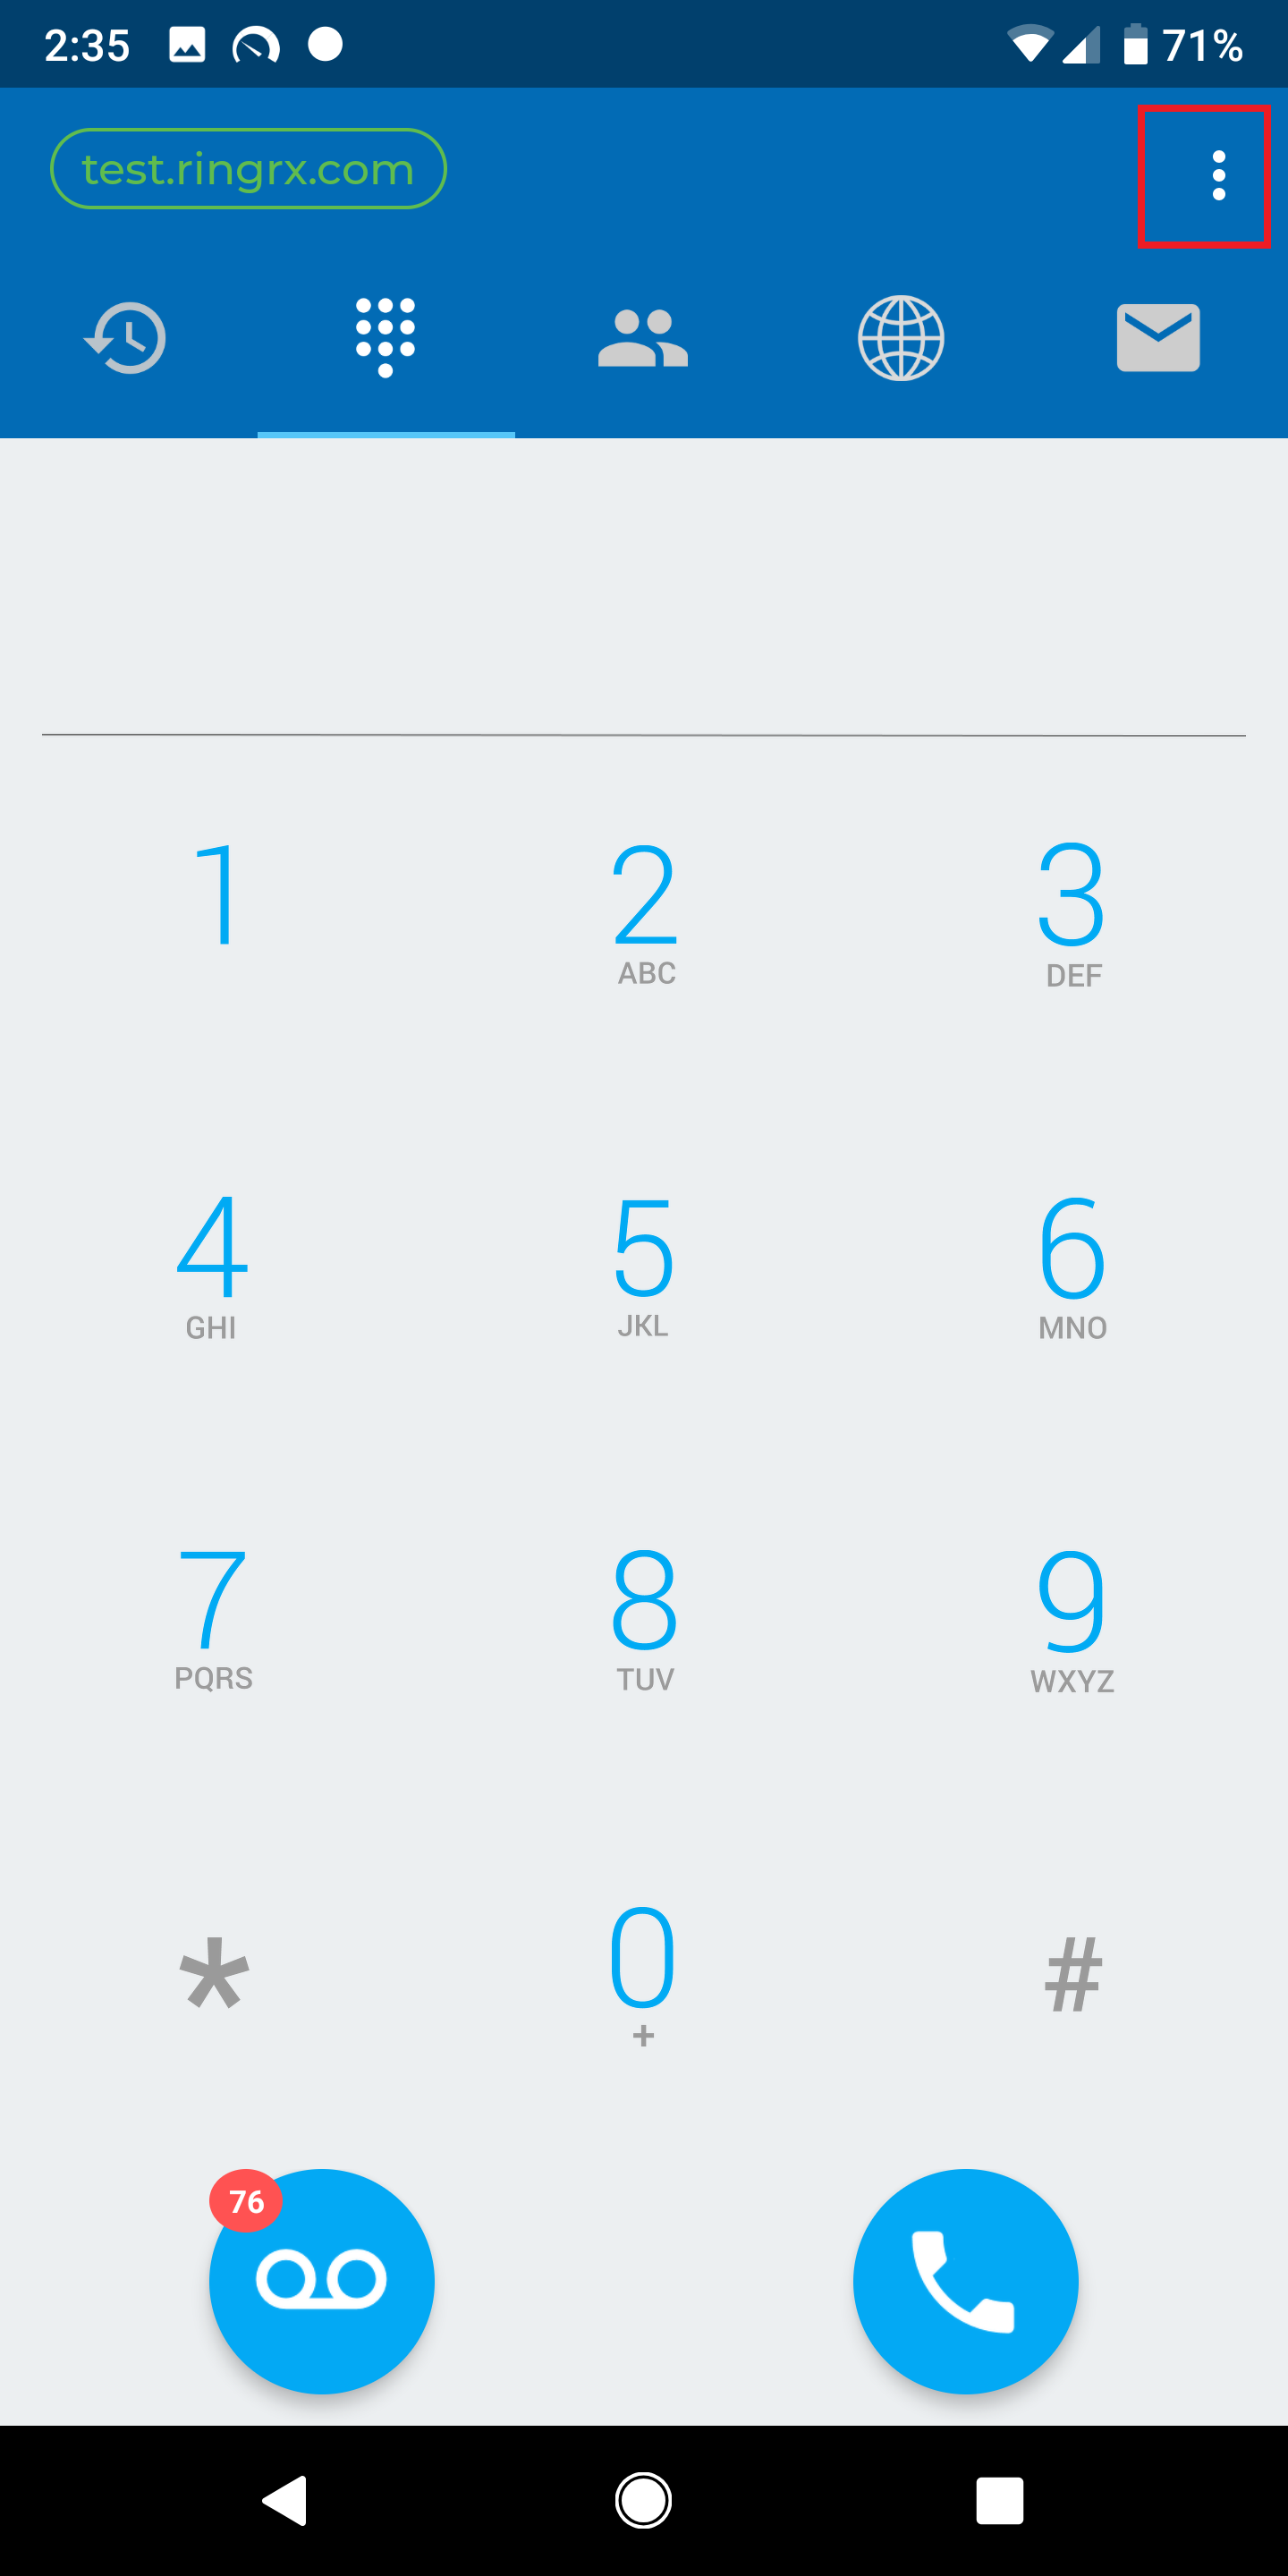
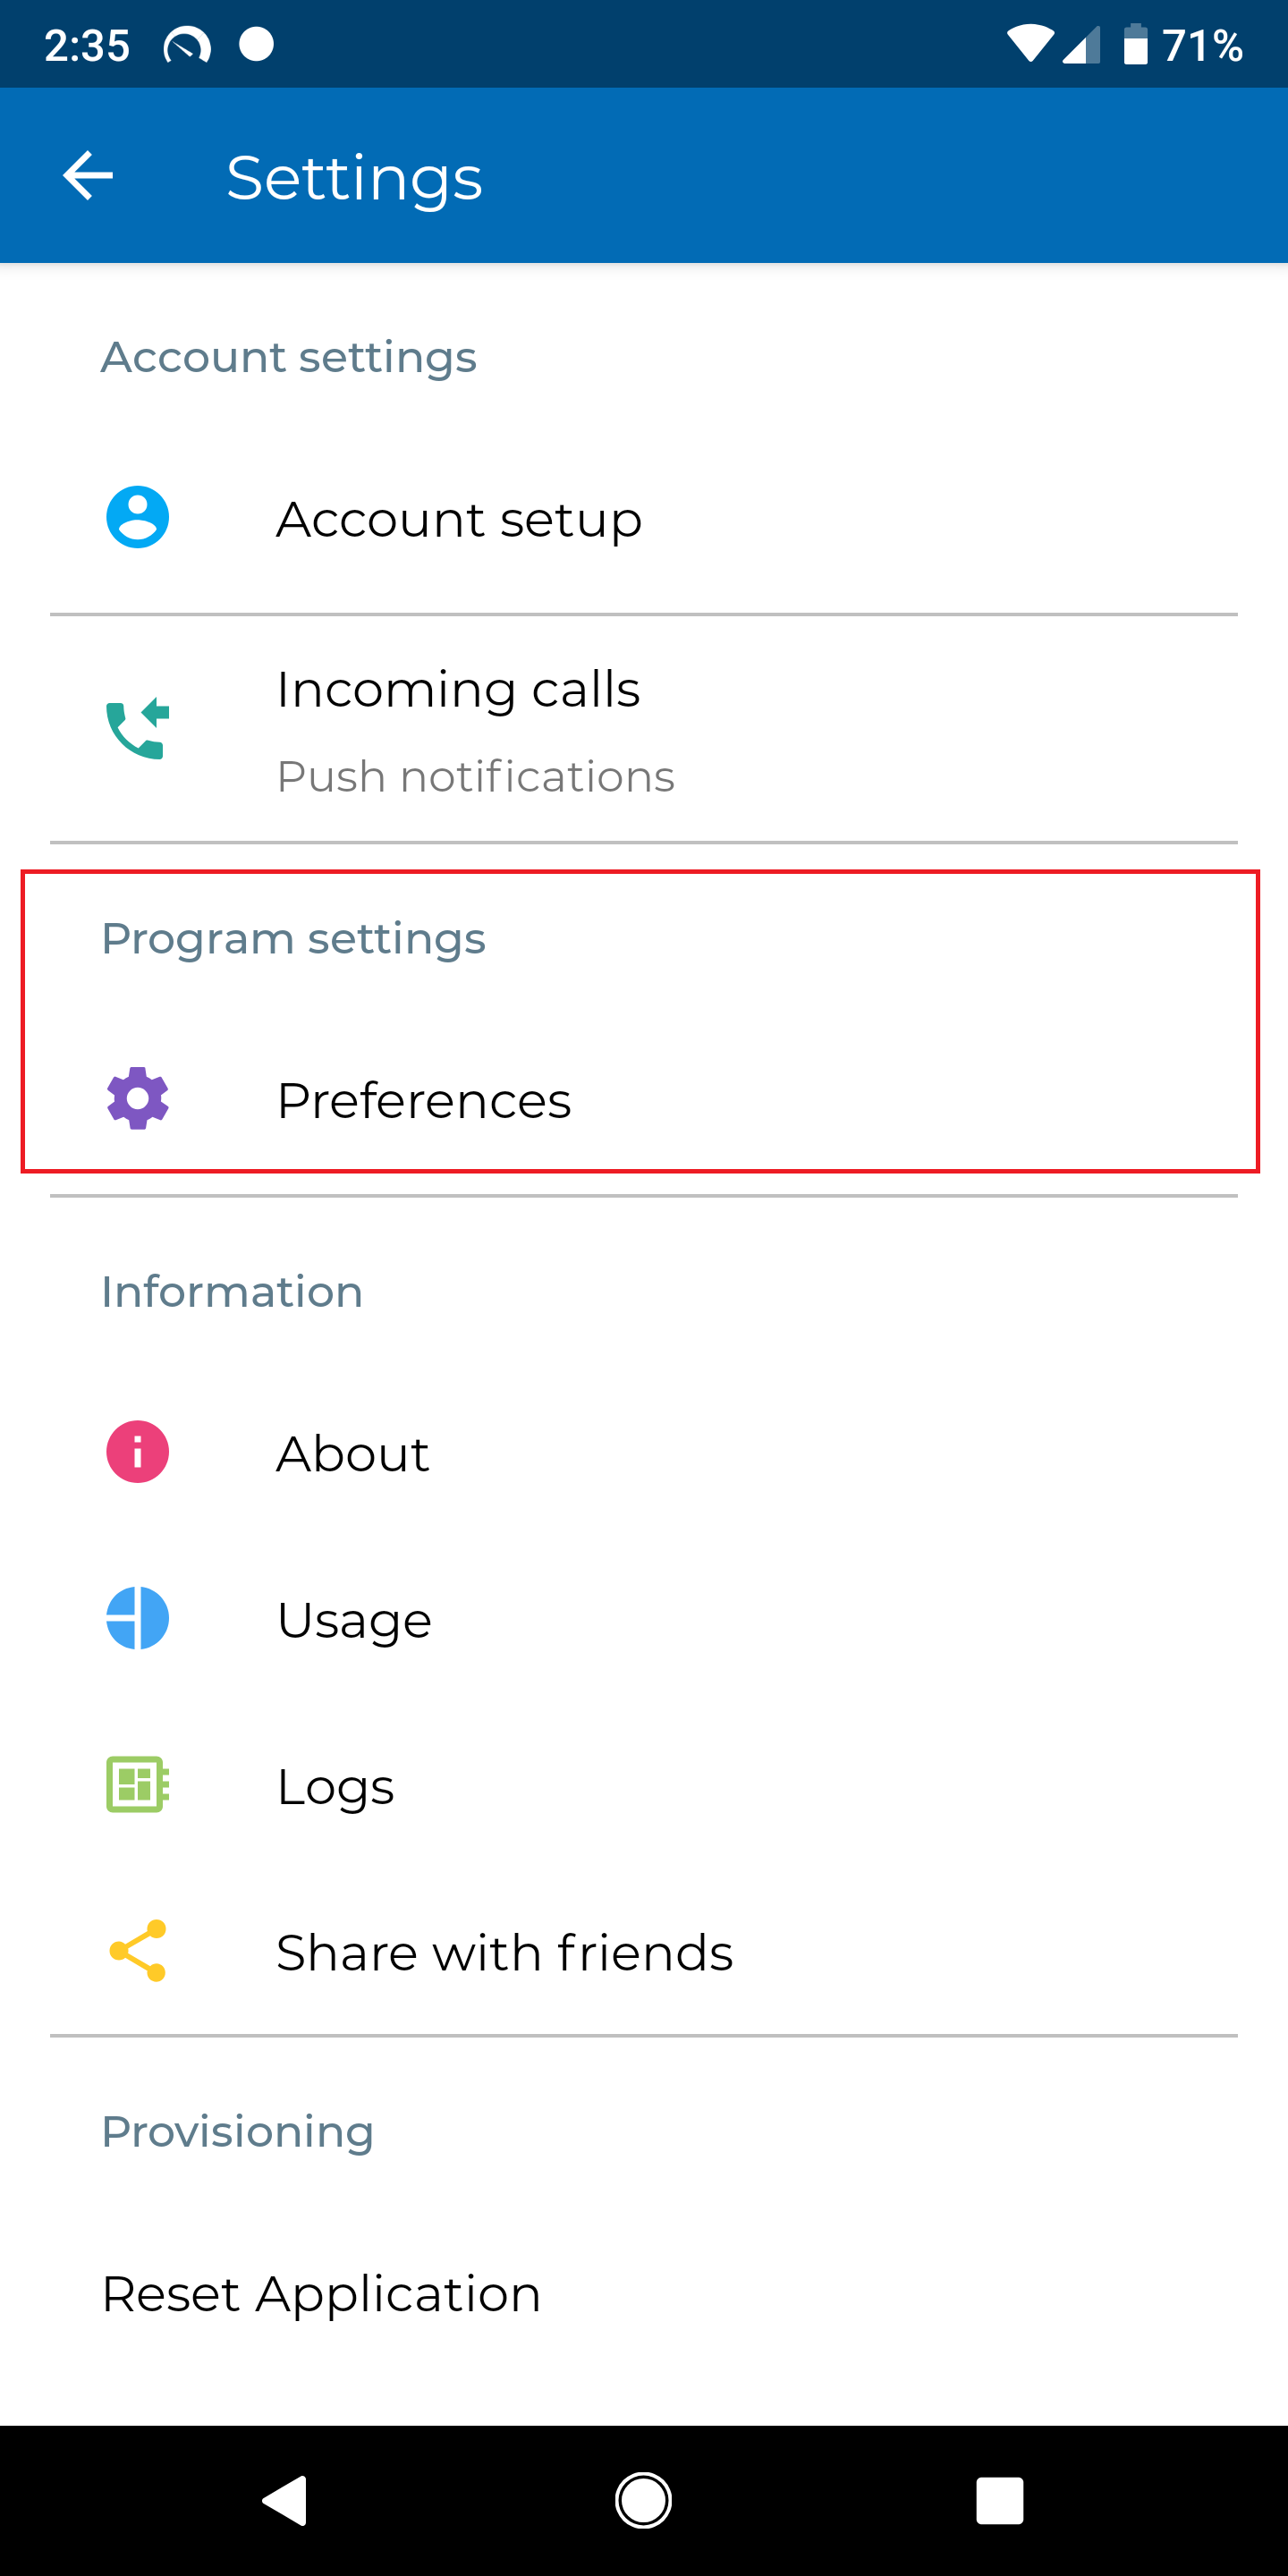
First navigate to the application settings using the icon on the top right
Then select “Preferences”
Then enable the troubleshooting logs
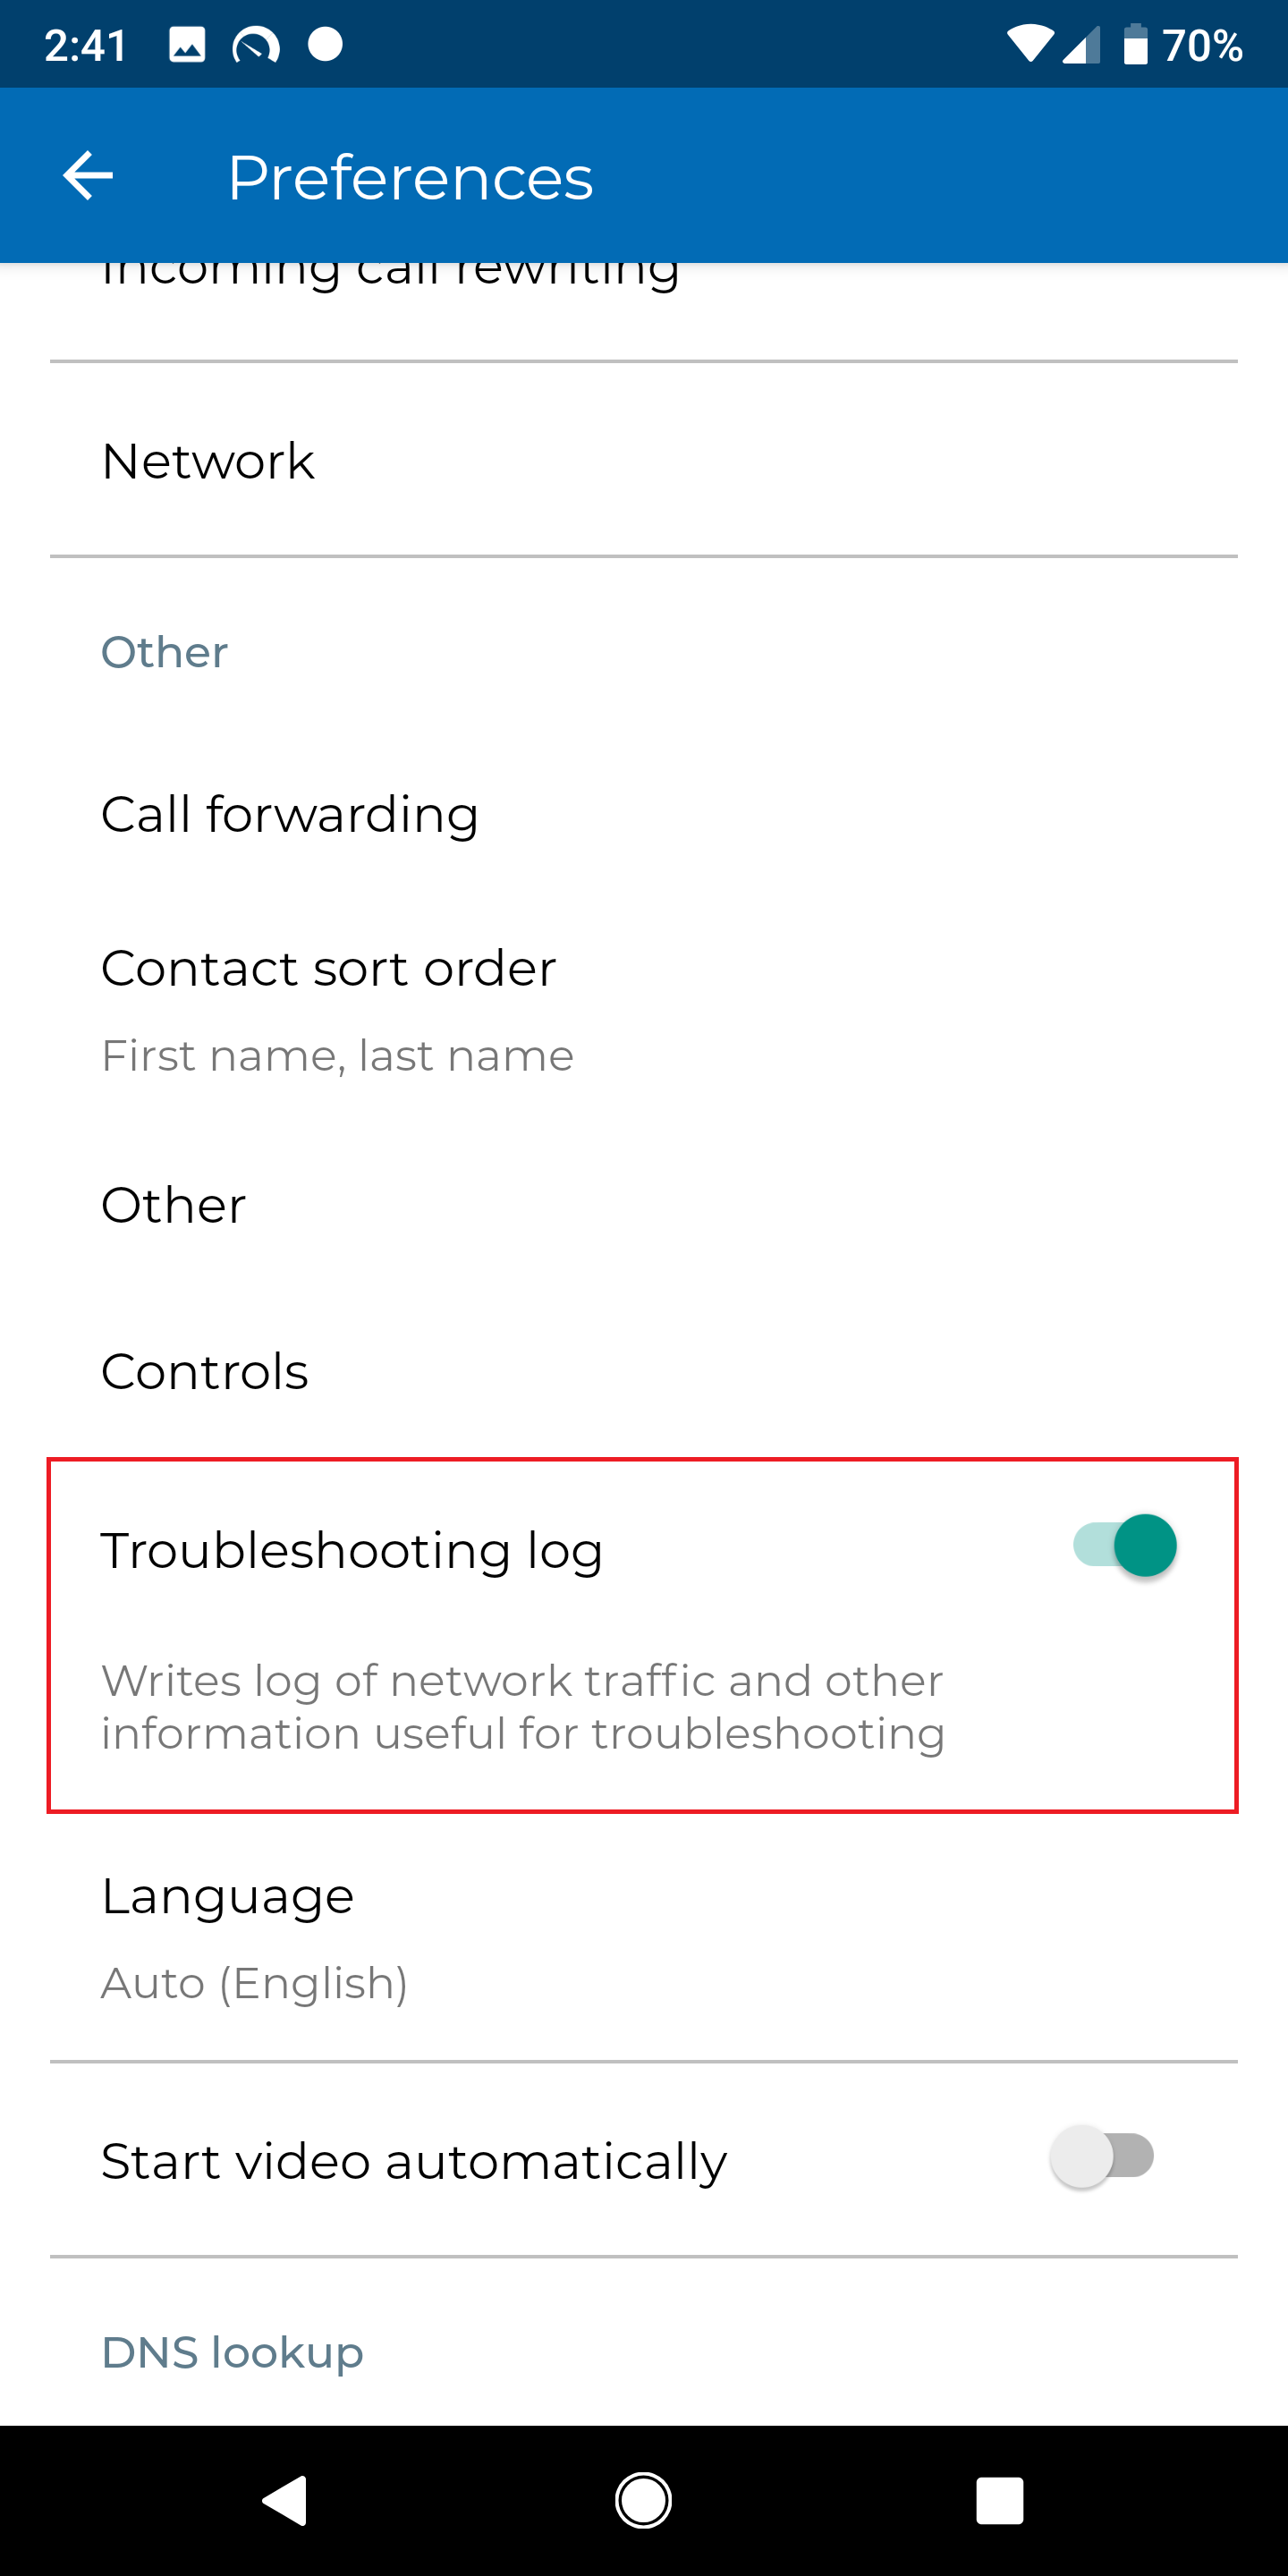
Now logging is running. Work to reproduce whatever problem you are diagnosing and then submit the logs to RingRx
Collecting Logs on Android
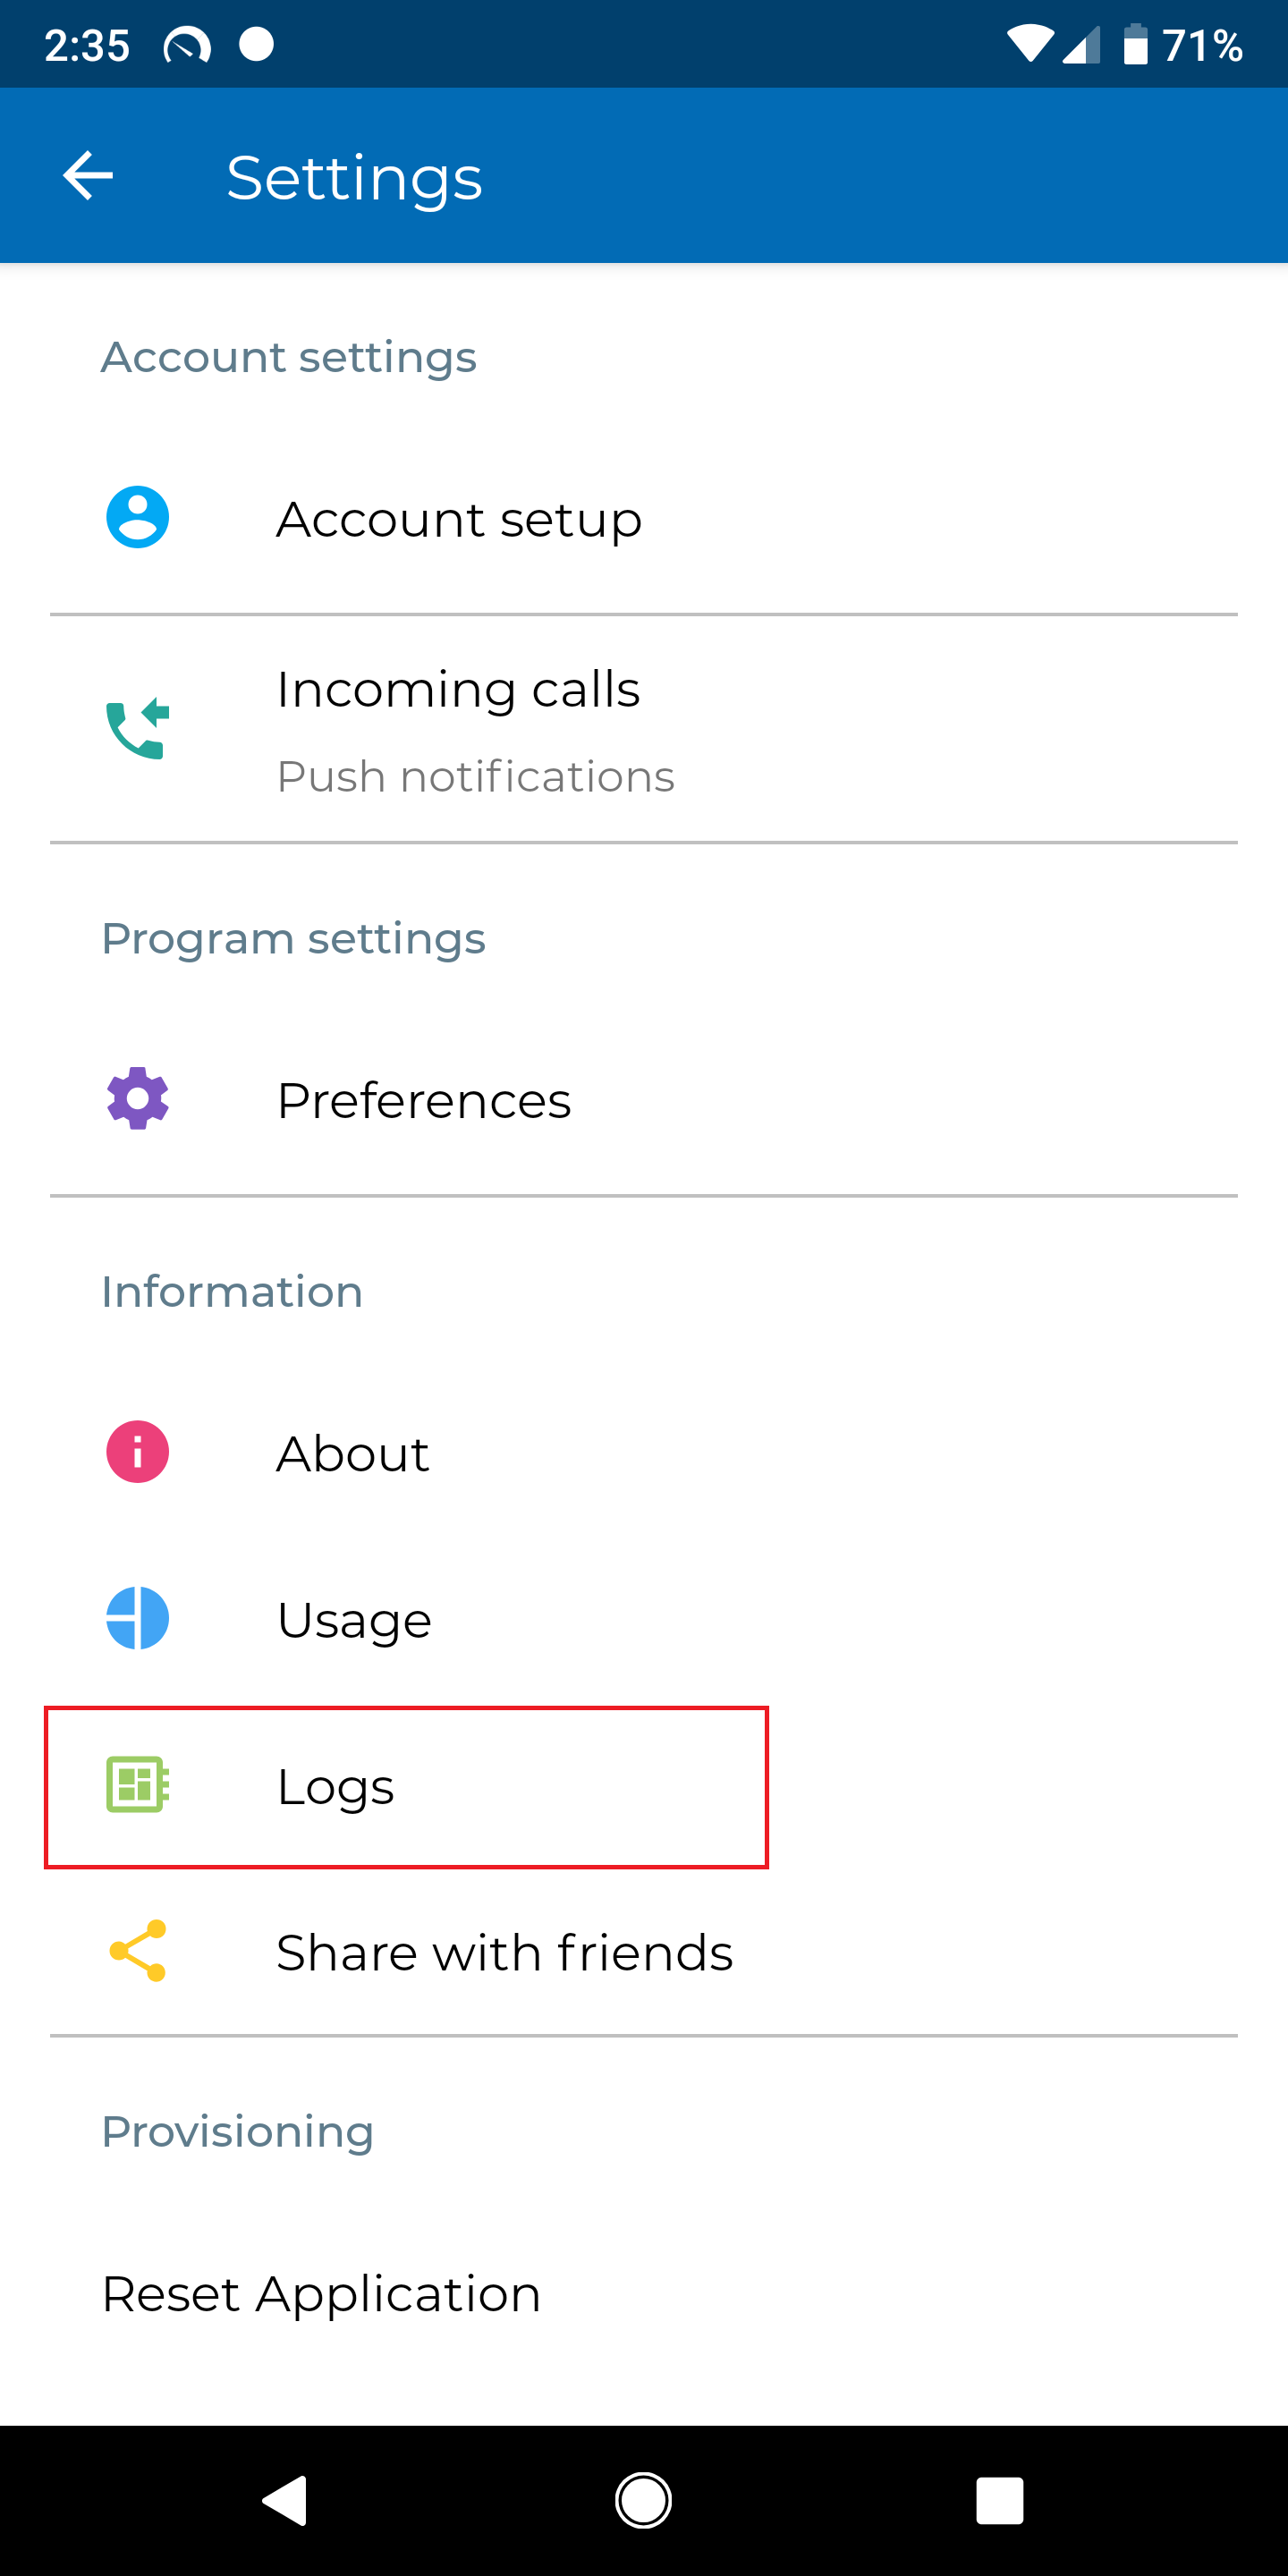
First navigate to the application settings using the icon on the top right
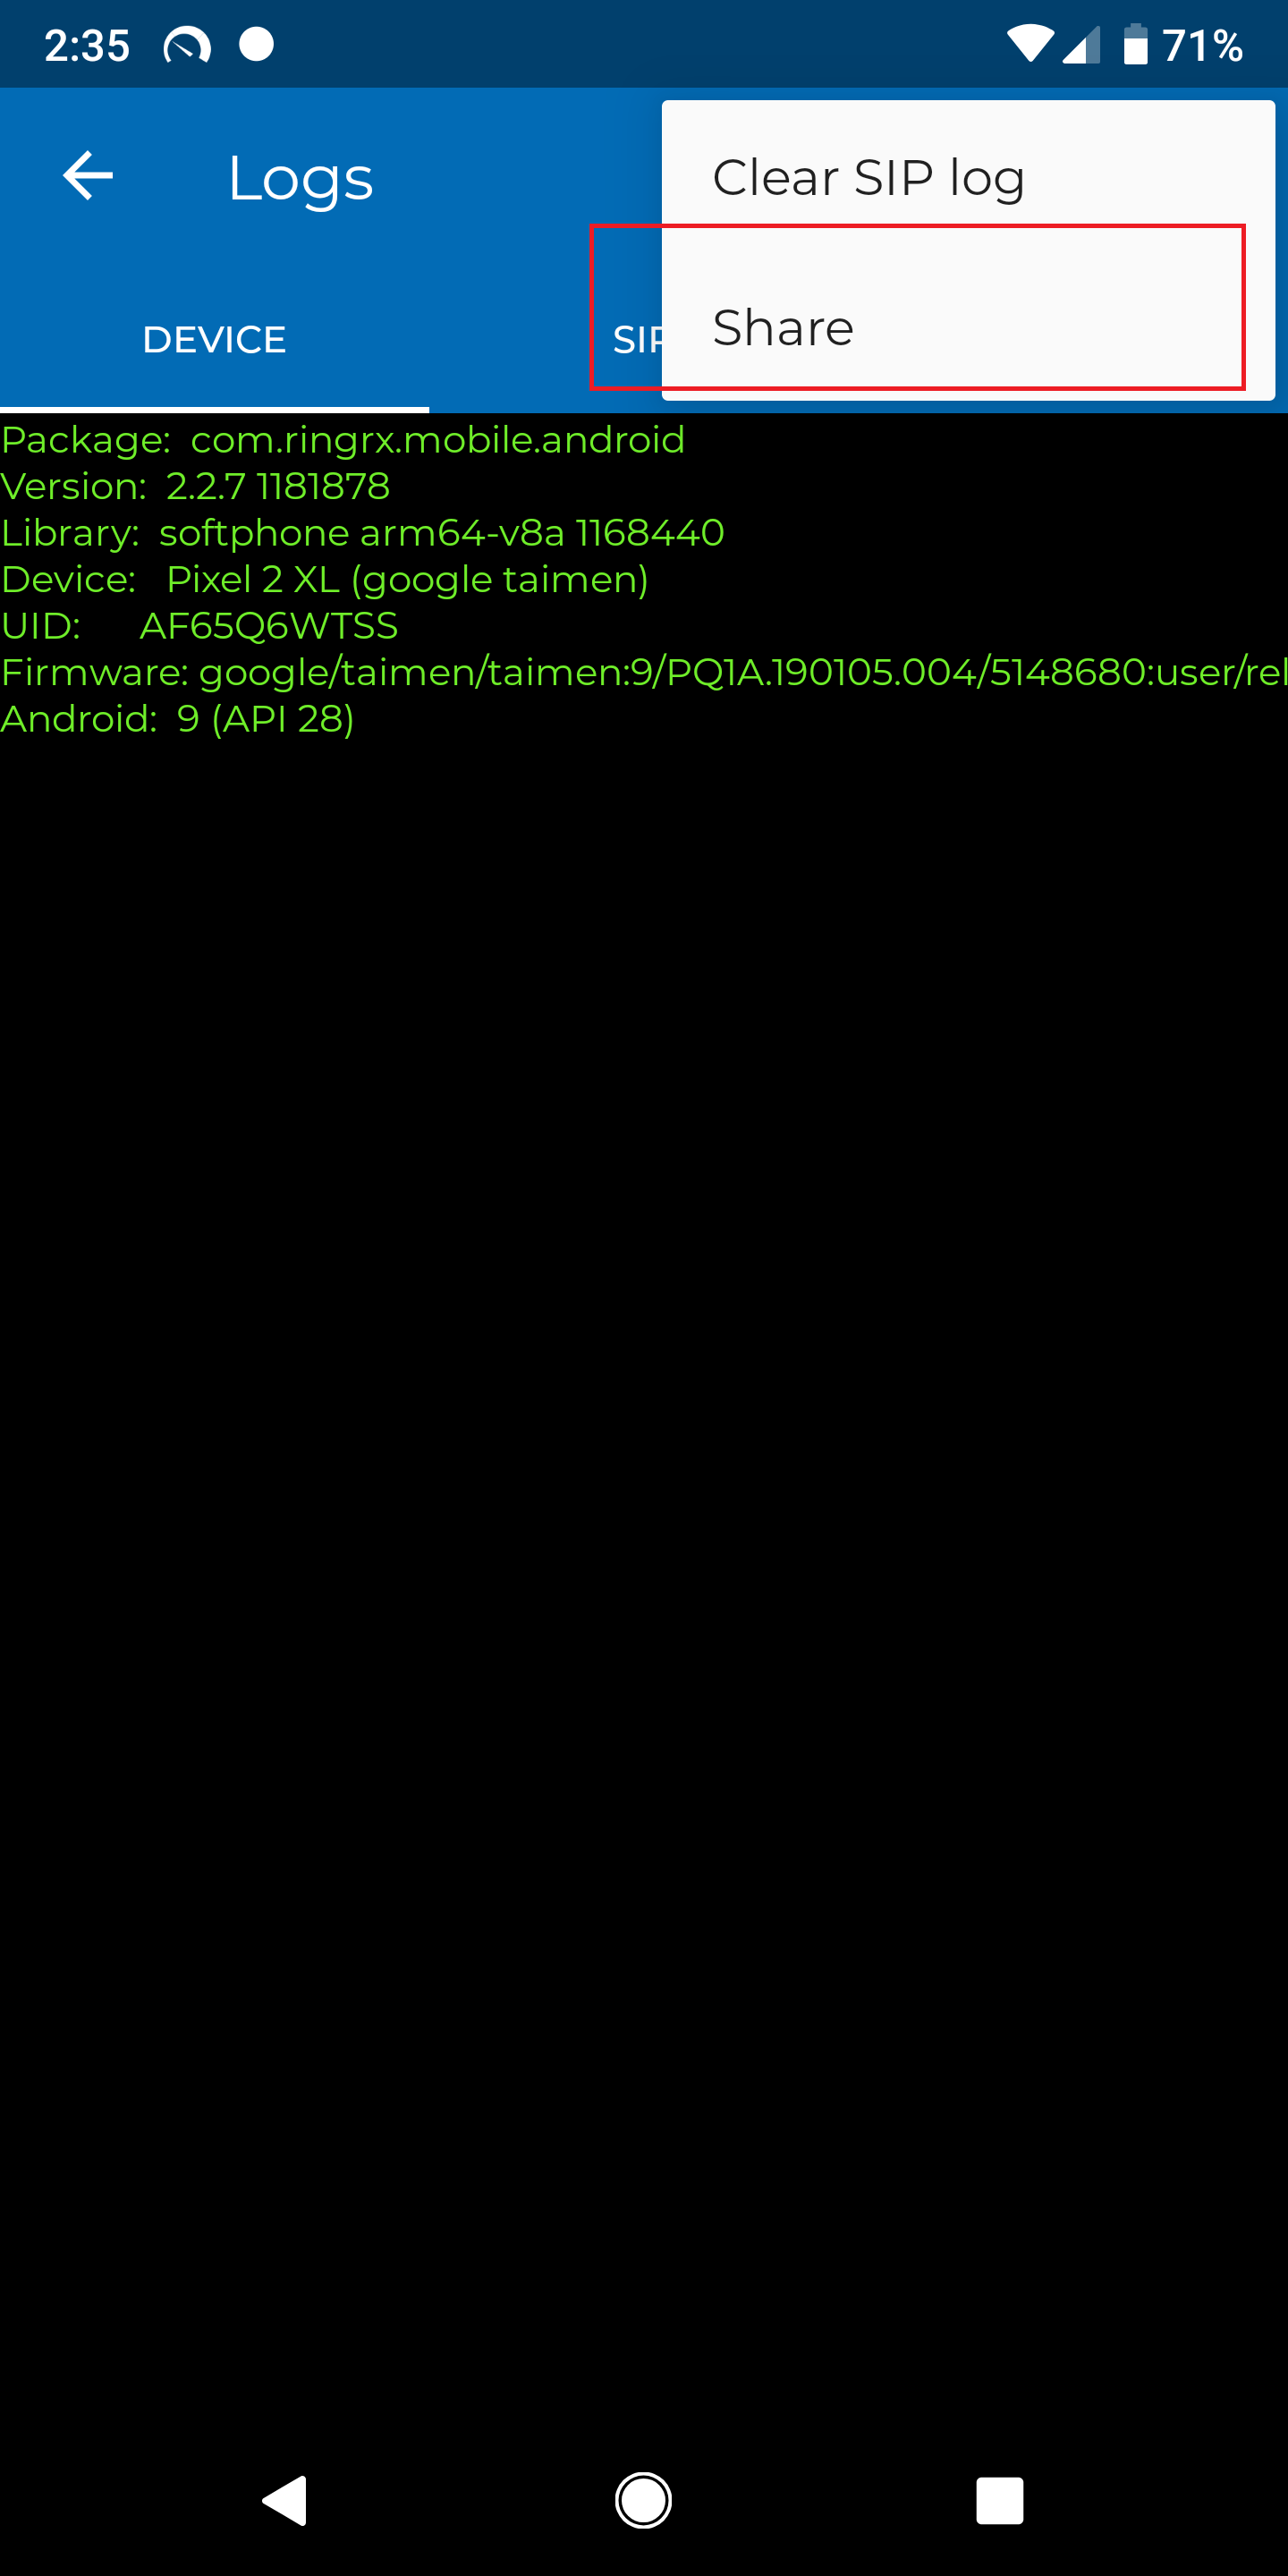
Then select “Logs”
Then select logs options on the top right
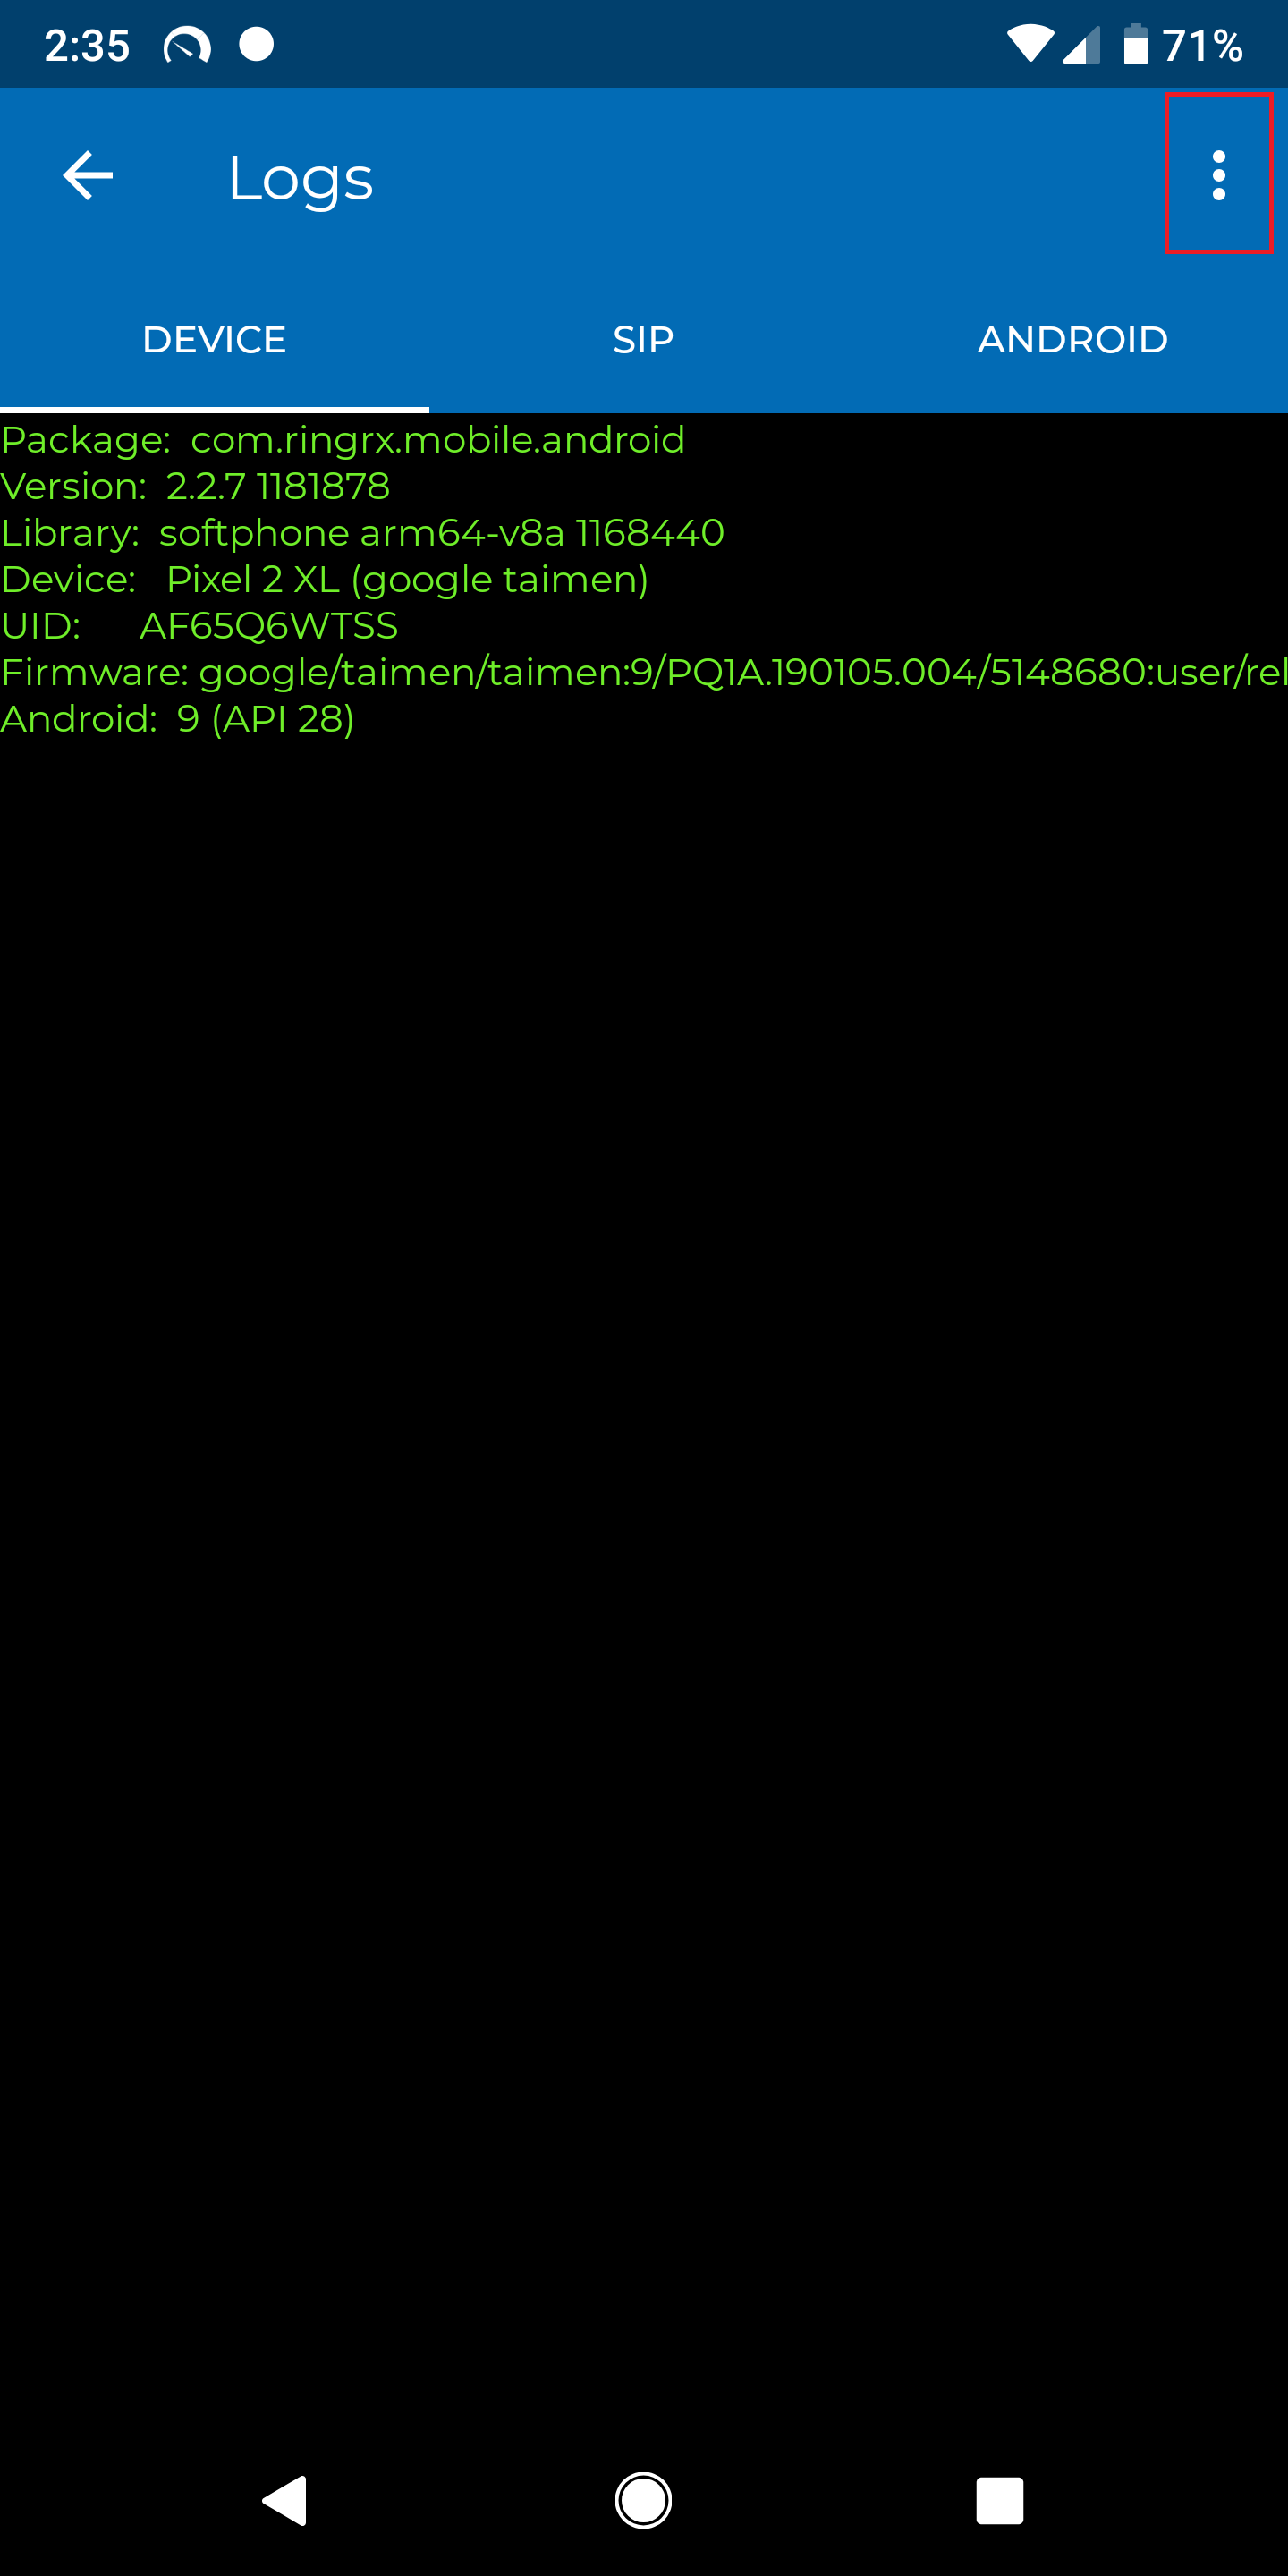
And using share email them to RingRx